

Candlewicking Embroidery Tutorial
Video: Watch how to make the Colonial Knot
This embroidery tutorial was inspired by a technique called candlewicking. Candlewicking originates from the pioneer times of America, a time when women had very little access to varying fabrics and threads. Instead, they would use the twisted cotton wicks that were normally used for candle making.
Candlewicking Embroidery Tutorial
Candlewicking on a quilt block is simple and very attractive, it can give your handmade items a vintage look if you use the right color combination.
However, candlewicking can be used on a variety of handmade items. Tea towels, baby clothes, dress hems, doll dresses, and of course, quilt blocks. I considered reducing the block size to 6″ then repeating the Candlewicking pattern in different colors to make a beautiful table runner.
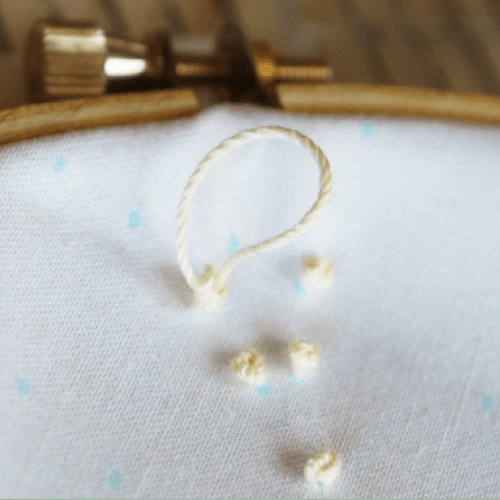
A Colonial Knot is used in candlewicking. This knot is sturdier than a French Knot, and a bit more pronounced.
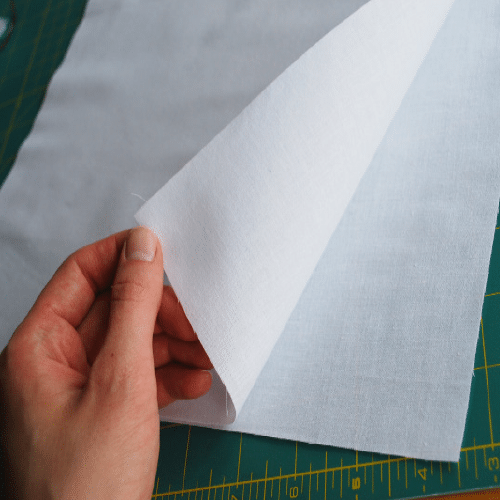
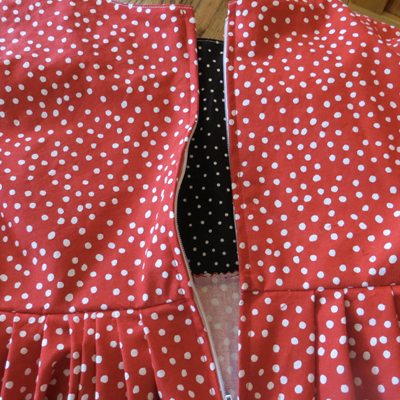
1. Place the two squares on top of each other, wrong sides together. Align the edges and iron out all the wrinkles. It is helpful to spray the fabric with a little liquid starch (sewing grade) at this point to help stiffen the fabric. Sew a 1/8” seam up two sides, or all the way around.
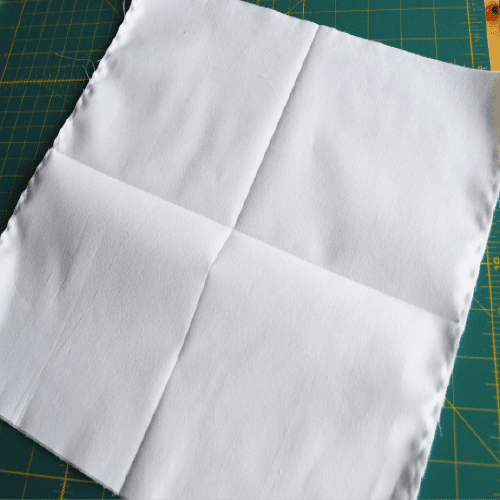
2. Fold the square into quarters; lightly iron the creases. Open the square, you are now ready to transfer the design!
There are numerous ways to transfer patterns, this is the method I used at the time. I really like using Stitch and Tear for embroidery patterns. (Ask in any fabric/craft store where to find this). Trace your pattern on the Stitch and Tear. Then simply layer the traced pattern with the fabric in a hoop (if desired), and stitch. Carefully tear off the paper when finished. I wouldn’t suggest this for beginners as your stitches need to be well-formed and secure.
For this Umbrella project, I used transfer paper. If you are using another design just replace the ‘umbrella’ with your pattern name.
1. Trace the dots and alignment marks for the umbrella design onto the tracing paper. Cut a square of pattern transfer paper to fit the umbrella design. Depending on the quality of the transfer paper, you should only need one piece to copy the umbrella design all four times.

2. Layer the pattern transfer paper as it’s directions instruct, align on top of one of the quarters.
3. Line the centerline marks on the umbrella design with the center crossing lines on the block. Secure all the layers together with two or three pins.
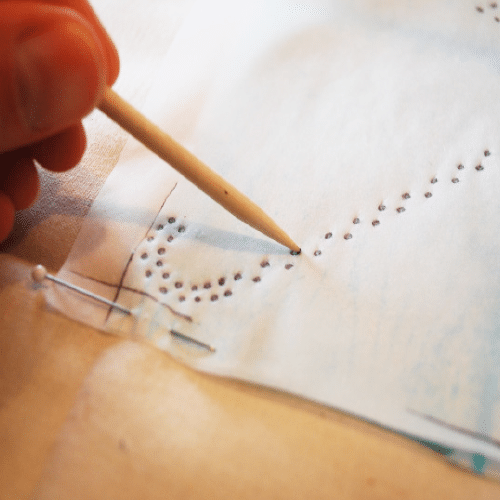
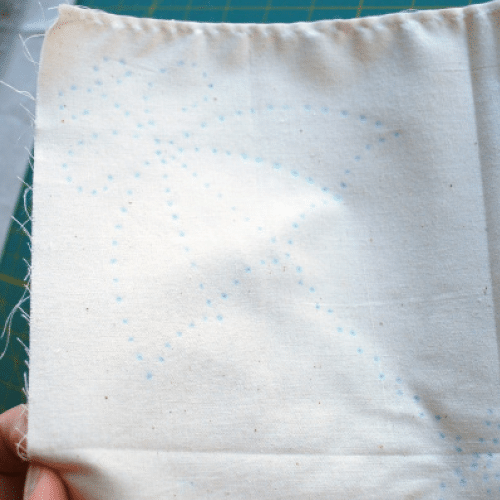
4. Use the cuticle stick to transfer the dots to the block by pushing in a circular motion. You must push rather hard, it may be helpful to lay an additional piece of tracing paper on top to prevent poking through. Check as you go to make sure the dots are transferring all the way. You can darken the dots a bit with a washable fabric pencil.
The result should look like the picture. Repeat the design in the other three-quarters
of the square. Flip the design in each quarter so the umbrella handles meet in the middle.
Once you have traced all four designs, you are ready to embroider! Do not iron the block before embroidering, this will be done once the block is complete.
Happy Candlewicking! Theresa
7/21/18 I am Grandma. Ellie is my granddaughter – age 12. I wonder if you could gather the simple beginner umbrella candlewick pattern, material, color of thread, hoops, and correct size needles. This would make her a kit with everything together. Sliding these into a Glad Bag will make a learning kit for Ellie. I think I could guide her some by using Skype or Facetime.
I live north of Pittsburgh, PA and she lives in the lower right area of Marathon, NY. I like to send gifts ready-to-go and I know she will be able to follow directions.
I live in a personal care home and have a prosthetic leg. Going to “JoAnn Fabrics” to make the correct selections myself was always something I did on my lunch hour in Butler, PA. Now I am restricted to travel on the Butler wheelchair van according to their schedule.
Your information online appeals to me much more than some other places where I was sorely disappointed. If you like the question and it is a possibility, Ellie has two sisters.
I will like to know if my idea appeals to you. We must establish that step together before we move on to the next step concerning willingness and payment prior to moving on.
Thank you very much for considering this. Warmly, Katherine Rapp
katherinewrites124@yahoo.com
I sent you an email Katherine! I would love to help.
Thank you! Your directions were the best on here!! Diana
Hi Diana! So glad they helped! Thanks for visiting!