
I love this quick and easy applique` using my sewing machine, I had to share! I’ve been working on some little projects for some carry-around stitching storage (honestly, I’ve got thread and little bits of projects all over the place!), pincushions, and needle books, so I’ll share an applique` tutorial from these projects.
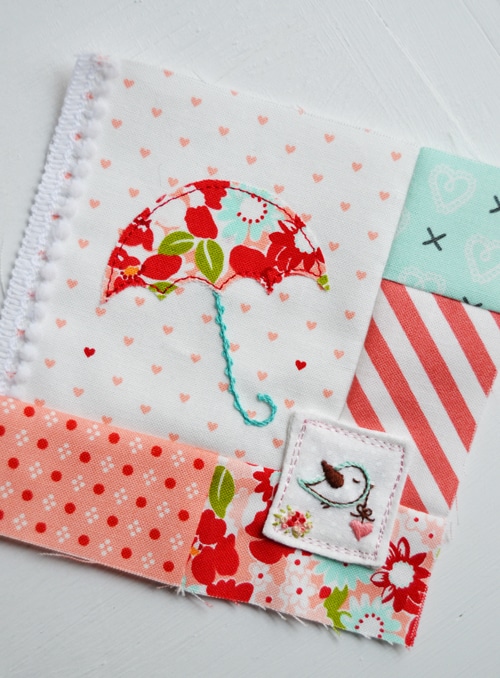
This is my umbrella applique` for a pincushion I made…
There are a couple easy applique` techniques, but I love this one the most. It is so simple and works with any shape you can think of, making it much easier than needle-turn applique (which takes me forever!) You can quickly applique` an entire design in a few minutes, and it has the prettiest simple charm to it.
Quick and Easy Applique Using Your Sewing Machine
You will need the following supplies: Your template(s) and fabrics, coordinating cotton or polyester threads (I often use the silky machine embroidery threads), Wonder Under paper-backed fusible web, pencil, an iron, small sharp scissors and of course, a sewing machine.
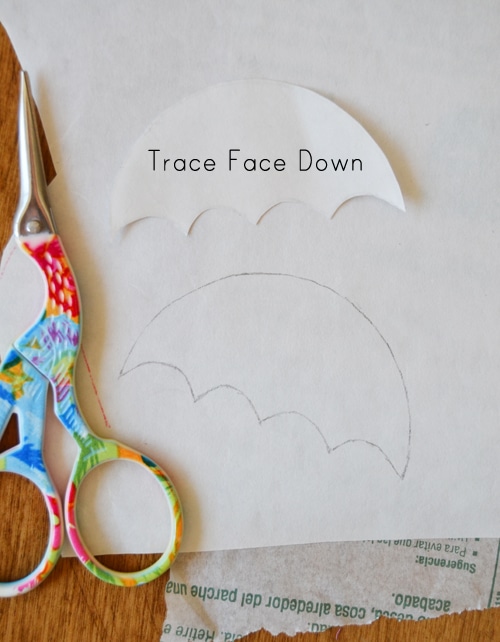
- Trace your template on to the paper backed fusible web. This first step is very important. Always trace your template on the paper side of the fusible web, right side (face) down. Draw a little sign or mark of some kind on the right side of the template so you can remember! For some shapes it doesn’t matter, but for others (ahem, letters), you need to get it right.
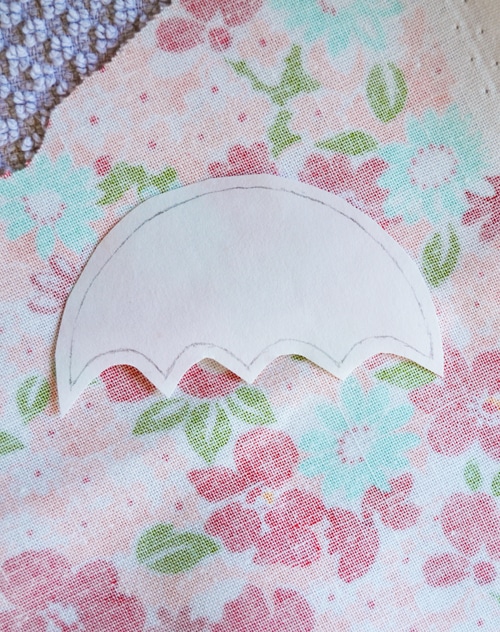
- Cut out your shape, leaving about a tad more than an 1/8″ around the pencil edge. This doesn’t need to be precise, you just want extra around the shape!
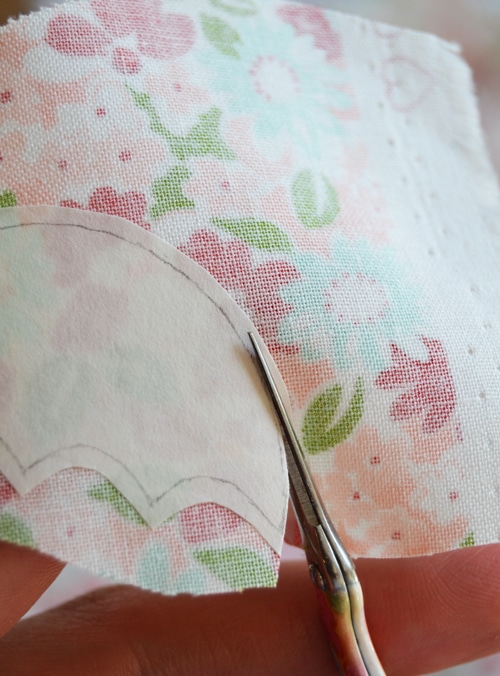
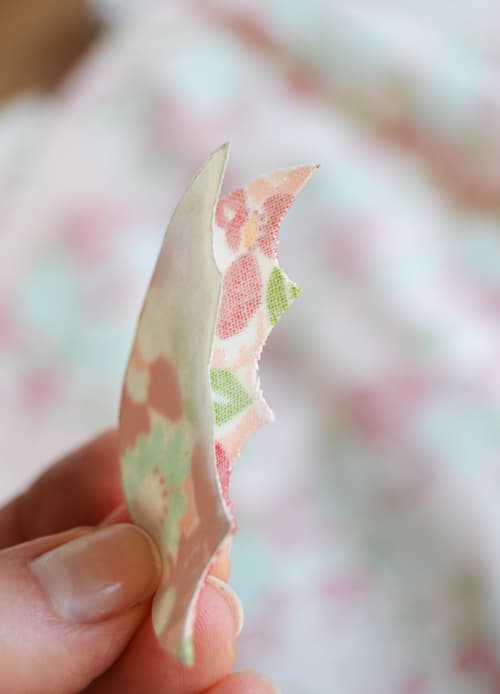
- Ready to iron to your fabric! Place on the wrong side of your fabric and press with a hot iron. Hold the iron down flat for 10 quick counts and lift up. Don’t rub the iron over it! Press one more time for another 10 quick counts. Use small sharp scissors to cut it out on the template line. Use a needle to separate the paper backing from the fabric. Don’t use your fingers to peel them apart as you could shred the edges of your fabric.
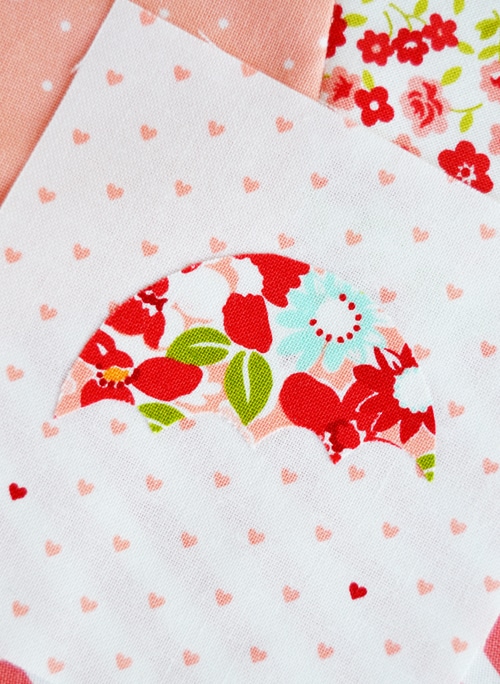
- Arrange your piece(s) on your base fabric. The ironing board is the best place to do this, so when you’re ready you can just press in place with the iron. Again, use the 10 quick count twice when pressing the pieces.
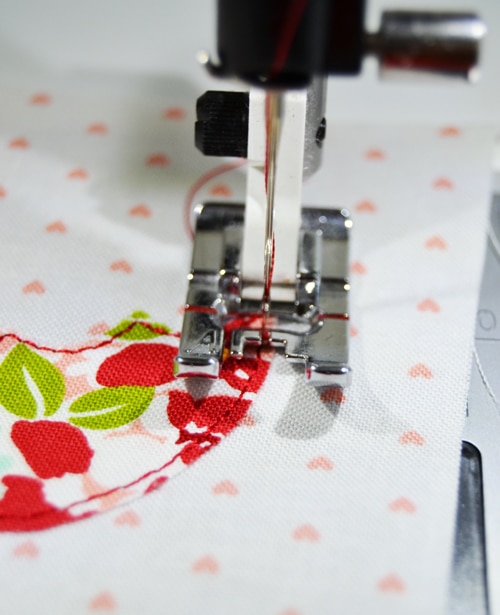
- The last step, stitching! Caution, Wonder Under is not enough to hold your fabric in place, you must stitch the edges down. I use a straight stitch on my machine, and set the length a little shorter than my sewing machines default length. When you start, take one stitch forward, then back up one stitch to secure your thread. Stitch about an 1/8″ from the edge of the fabric. This is not the best time to speed stitch! Sew slowly, especially around curves. When you approach a point or corner, slow down and take the last stitch or two manually with the hand-wheel.
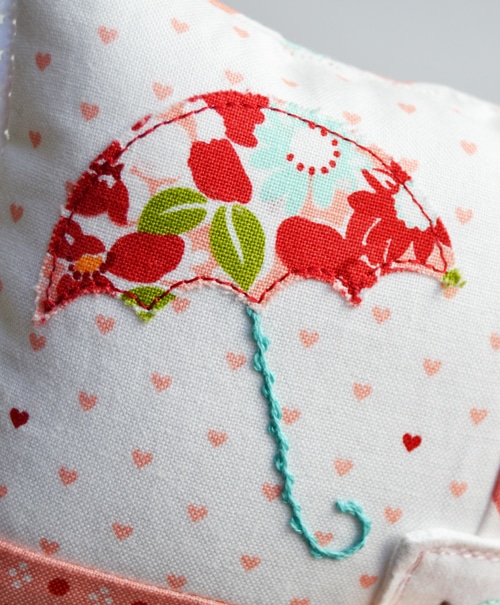
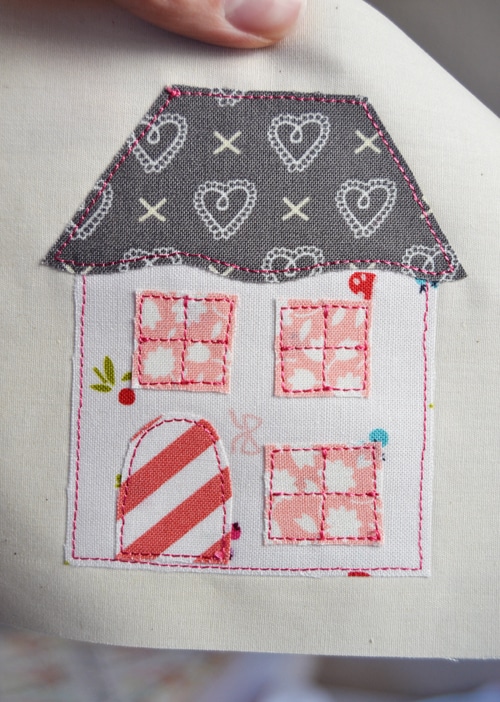
Adorable, right? Here is another project I stitched up the other day, I’m going to turn it into a needle book. I loved how it turned out…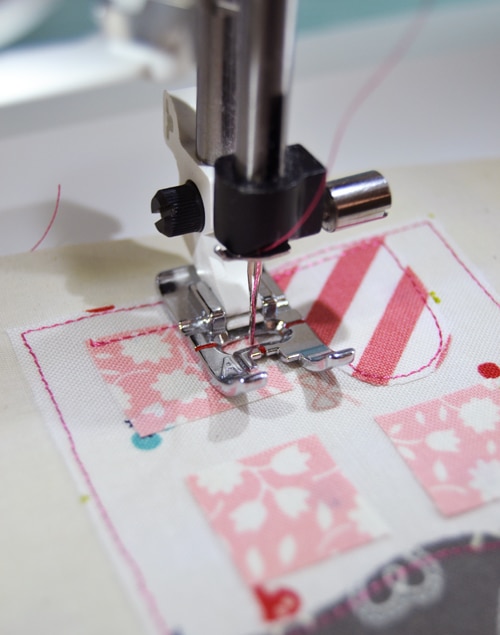
I turned my umbrella applique` into a pretty little pin cushion, I’ll share the pattern for that soon!
~ Jessica
Child of God, Wife to Josh, Mommy to my four sweet children. Thankful for busy days filled with homeschooling, homemaking and loving my little family! And sneaking in sewing and pattern design whenever I can 🙂