
To slip stitch a quilt binding the right way is very important if you want it to look neat and clean. I’ve been working on finishing a quilt this week. Slip stitching the binding was the last step, and I can finally hang the quilt on my little girl’s wall!
How to Slip Stitch Quilt Binding the Right Way
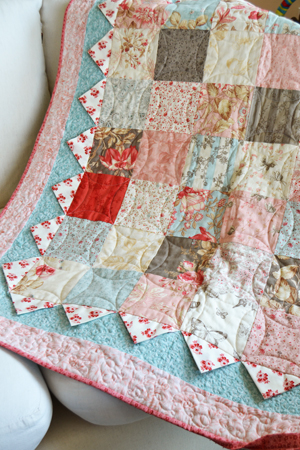
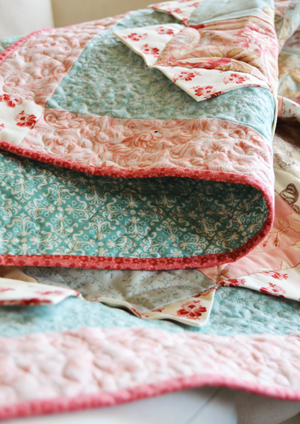
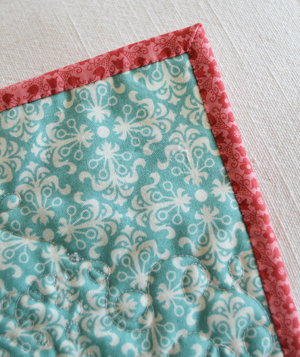
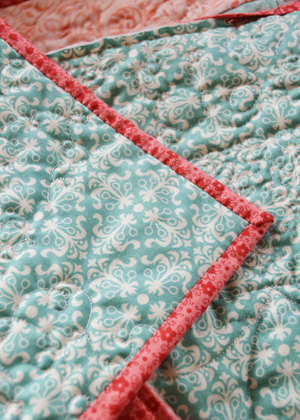
While stitching, I started thinking about the different methods I’ve seen quilters use for finishing the binding. I like the way my mother and I were taught and thought I would share it. In my opinion, it’s the neatest, cleanest and prettiest way to finish off a quilt. Teeny tiny, barely visible slip stitches.
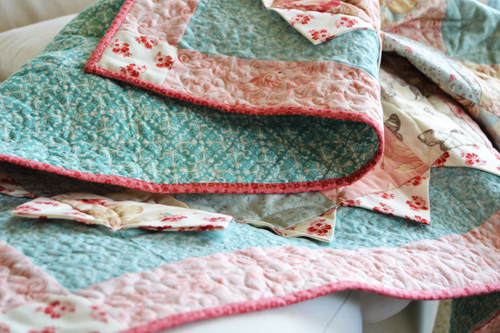
I’ve noticed some examples lately that I consider to be bad methods. The quilt below is an example of binding sewn down with a sewing machine. That’s too messy. The sewing machine does make finishing the binding faster, but after putting so much work into the quilt top, do you really want to give it such a messy finish?
Finishing the right way is very worth every bit of the effort! Let me show you what we do with the stitching. It’s very simple. We will have more on making your own binding and attaching in a future post. 🙂
Tips Before You Start
– Always use a good cotton thread, that matches the binding not the backing of the quilt. If the thread matches both, great – but it’s more important that the thread match the binding.
– Use a single thread, not a double thread.
– Whenever you insert your needle into the quilt back, always make sure you don’t push the needle through to the front of the quilt. You only want to catch the back layer of fabric! Otherwise, you will find a lot of little stitches on the front of your quilt.
~~~~~~~~~~~~~~~~~~~~~~~~~~~~~~~~~~~~~~~~~~~~~~~~~~~~~
When you start, you need to secure the thread under the binding. Thread your needle with a single thread, and knot the end. Bring the needle through the quilt edge, on the outside of the seam, as shown. Don’t poke through to the front!
Pull through. Now, this part is optional, just a little something I like to do to make the knot extra secure so it doesn’t pull through. Insert the needle again, like so… but as the little loop starts to close…
Slide the needle through the loop, and then pull tight. It makes an extra little knot. 🙂 Takes a few seconds and is worth doing.
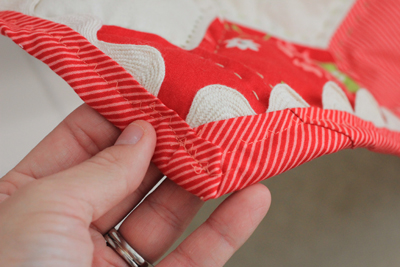
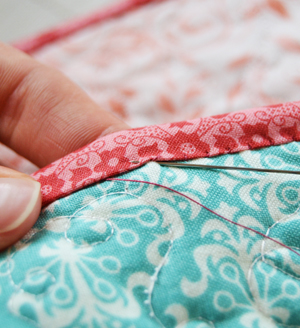
Fold your binding over, making sure it’s even, and hold in place with your thumb.
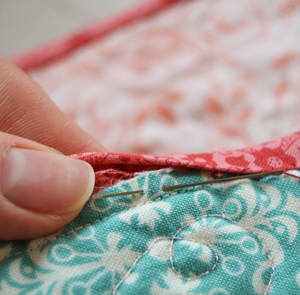
Now, your first stitch. NOTE: Do you see how the thread is way off from where I’m starting? It doesn’t matter, because when you make your first stitch, the whole thread is going to disappear right under the binding.
Insert the needle just at the edge of the binding, as close as you can get to it. Now slide the needle about 1/4″ down, and come through the binding, just on the edge of the binding… just like this.
Pull through. Okay, I have quite a little row of stitches (I was ahead when I started), but yours will look like this. 🙂
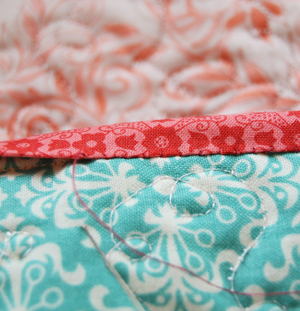
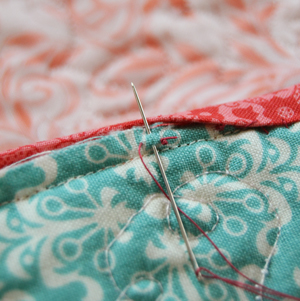
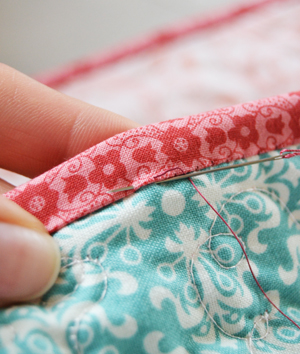
Let’s do it again! Now, for your second stitch, it DOES matter where you put the needle… because the thread will show at this point.
Insert your needle directly UNDER where the thread is coming out of the binding from your last stitch. This is the secret to getting tiny, you-can-barely-see-them, stitches!
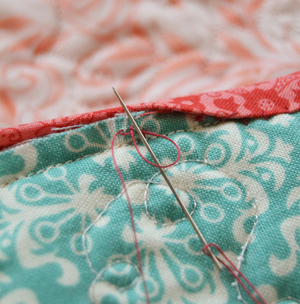
See? Right underneath… slide the needle over and bring out through the edge of the binding. Are you checking to make sure you haven’t poked through to the front?
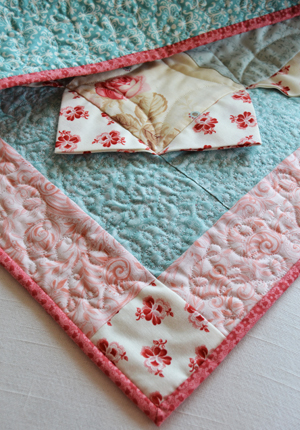
Repeat. All the way around the quilt. Isn’t that simple? You will be glad you did it this way. Your quilt will be beautiful.
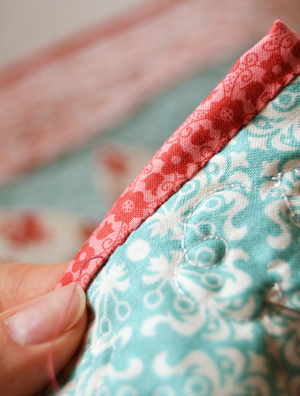
Those mitered corners will naturally fold, and you can stitch those corners down neatly.
Happy quilting! Jessica
Child of God, Wife to Josh, Mommy to my four sweet children. Thankful for busy days filled with homeschooling, homemaking and loving my little family! And sneaking in sewing and pattern design whenever I can 🙂

Beautiful!
I love everything about this quilt . . . the fabric, the design, the quilting and the binding! So lovely.
What a great instruction and beautiful quilt!
Querida Jessica: Me encanta saber que lo estoy haciendo bien!. Muchas gracias por tus trucos. Un abrazo gigante!!
Thanks for this tutorial…using it right now!
You’re very welcome! Thanks for visiting!
Thank you. I like the tip of leaving that extra knot.
Glad it helped, thanks so much Patti!
Thanks for the reminder to match thread to the binding, not the back. Also, I was trying to stitch on the other side of the stitch line. Big difference!
Hi Helen, Glad it helped! Thanks for visiting!
This was so helpful. I typically do machine binding but I had something very small (7.5″ x 7.5″) that I had paper-pieced. I never do hand binding and was concerned that my stitiches would show. Your method is fool-proof and so professional looking. I’m glad I found you!
Thank you thank you thank you
THANK YOU 🙏 I could not figure out how to do this correctly, kept undoing my work and starting over. I’m so happy with how it’s looking know!
Yay! You’re very welcome! I’m so glad you found it helpful. It’s a pain to undo work! Many blessings, Theresa